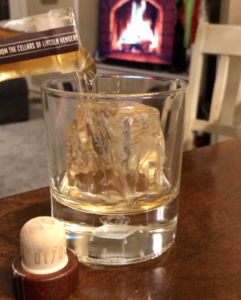
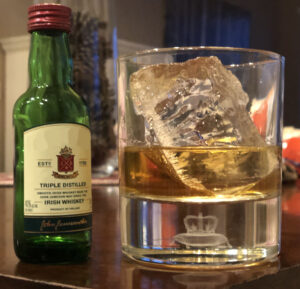
 How to make crystal clear ice cubes
How to make crystal clear ice cubes to add some class to your beverage. Have you ever wondered how those fancy bars get their ice cubes to look so dang good and crystal clear? There are so many products out there that fail miserably. I can’t tell you how many times I have ordered different products only to be disappointed.
Crystal clear ice cubes to the rescue
Well have no fear because I have stumbled across the correct process and it’s SUPER EASY! It doesn’t involve purified water, or boiling water or any fancy moulds. It’s all about how the ice freezes and the cooler is the key! It doesn’t take some crazy expensive cooler either. The one I use comes from Amazon and it’s only $12 bucks.
Tools needed to make crystal clear ice cubes
The cooler, a large bread knife and a hammer is all you need. Each batch yields about 12 crystal clear ice cubes! It’s so super simple to do!! Here are the steps to take and the products you will need to pick up from Amazon if you don’t already have them at home.
 The crystal clear ice cube simple process
First I want to tell you about the process and how the ice freezes so you can understand why this method yields beautiful crystal clear ice, EVERY TIME! The process that makes the ice freeze clear is dependent on the vessel you use to freeze it.
The process involves freezing unidirectionally, meaning, in this case, freezing from the top down while insulating the sides and bottom. Freezing from the top down cause all the air bubbles (This is what causes ice to be cloudy) to get pushed down as the water freezes leaving behind beautiful crystal clear ice. All other moulds that I have tried always failed not because of the purity of the water but because the froze on all sides at the same time forcing the air bubbles to the middle of the ice cube thus making the cube cloudy and leaving you sad and unfulfilled.

Why is this the best way to make crystal clear ice cubes?
The tools you need as I mentioned above are inexpensive and some you may even have around the house already. If not, I have provided a link to the three items I use below. Also below is a link to a pdf document that explains step-by-step how to make crystal clear ice cubes with VERY LITTLE effort.
Be kind and share your new found clear ice knowledge
I was so happy to learn this process that I shared it with all of my friends immediately and not one of them was disappointed, in fact they were all extremely grateful and so excited and impressed that they send me a photo every time they make a drink. I’m not gonna lie, it makes the drink taste better even if it’s just in my head. I also take a photo every time I make a drink because I still can’t believe how easy it is to make and how great EVERY drink I pour looks!
Here is a list of the tools that will make you successful making clear ice:
Coleman FlipLid Personal 5 Quart Cooler – Amazon $12.35 – https://amzn.to/39iyh8H
Orblue Serrated Bread Knife – Amazon $13.97 – https://amzn.to/3iOOvJP
SE 20 oz. Rock Pick Hammer – Amazon $18.99 – https://amzn.to/3a022Ko
Now for the secret you’ve all been waiting for to make the most amazingly clear ice cubes you have ever seen.
A step-by-step guide making crystal clear ice cubes
- Fill the Flip Lid Personal cooler https://amzn.to/39iyh8H 2/3 of the way with water.
Tap water will work just as well as bottled or purified water. *Do not overfill* - Remove the cooler lid and set it aside. *Do not freeze with the lid on or it won’t work*
- *important* Put entire cooler, without the lid, in the freezer and freeze for 24 hours.
- Remove the cooler from the freezer and turn it upside down on a sheet pan to
catch the excess water. Leave upside down until you hear the ice drop, should be
less than a minute or two. - Set the cooler aside and grab a hammer https://amzn.to/3a022Ko and a large serrated knife. https://amzn.to/3iOOvJP A long bread knife works perfectly.
- Break open the part of the ice that is filled with water and let it drain. Knock off
all the excess partially frozen ice. - Cut a 1/4” deep groove approximately 2” from the edge and then tap the knife with the hammer and it should make a clean break along the groove. (It’s a good idea to measure your whiskey glass to make sure 2” cubes will fit in the glass) You can also use the pick end of your hammer to make organic shaped ice instead.
- Continue step seven until you have all the ice cut into approximately 2” x 2” x 2” cubes.
- Drop a cube in your glass, pour your favorite Scotch, Whiskey or other beverage of choice over the crystal clear ice, snap a photo, send it to your friends and enjoy.
Click below to download a FREE sharable/printable pdf:
https://envisionaryimages.com/CrystalClearIceCubes.pdf


